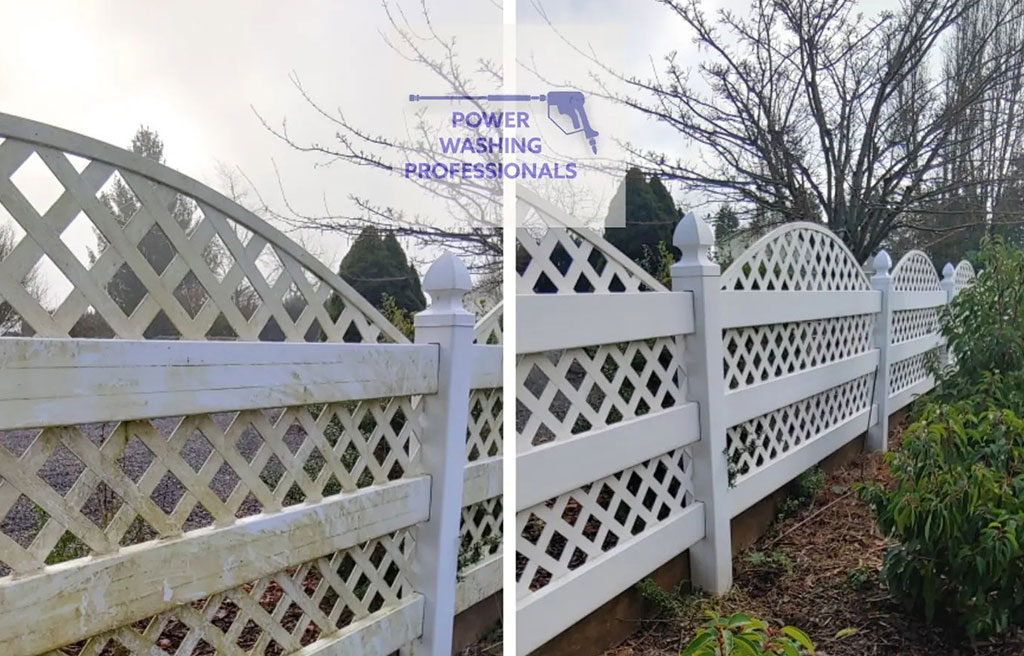
When it comes to maintaining the exterior of your home, one area that often gets overlooked is the fence. Over time, fences can accumulate dirt, mold, mildew, and other contaminants that not only diminish their appearance but can also lead to long-term damage if left unaddressed. Pressure washing is a highly effective and efficient method for rejuvenating your home’s fence, restoring its original beauty. In this comprehensive guide, we will walk you through the steps of pressure washing your fence to ensure a thorough and successful cleaning process.
Step 1: Gather Your Tools and Safety Gear
Before you start pressure washing, gather all the necessary tools and safety gear. You’ll need a pressure washer with an appropriate nozzle for cleaning, a garden hose, a bucket, a mild detergent or fence cleaner, a stiff brush, and safety equipment including safety glasses and gloves. Ensure that your pressure washer is in good working condition and that you have read the manufacturer’s instructions.
Step 2: Prepare the Area
Clear the area around the fence of any obstacles, including furniture, plants, or decorations. Cover nearby plants with plastic sheeting to protect them from detergent and debris. Sweep or blow away loose debris from the fence to prevent it from interfering with the pressure washing process.
Step 3: Pre-Treat Stains and Mold
For stubborn stains or areas with mold and mildew, consider pre-treating the fence. Mix a mild detergent or specialized fence cleaner with water according to the manufacturer’s instructions. Apply the solution to the affected areas using a brush or a garden sprayer, allowing it to sit for a few minutes to break down the contaminants.
Step 4: Connect the Pressure Washer
Connect your pressure washer to a power source and attach the appropriate nozzle for cleaning fences. A fan or wide-angle nozzle is often recommended for this task as it provides even coverage without causing damage to the wood. Adjust the pressure settings on the washer according to the type of fence material – lower pressure for softer woods and higher pressure for harder woods.
Step 5: Test on a Small Area
Before tackling the entire fence, test the pressure washer on a small, inconspicuous area to ensure the pressure is appropriate and won’t cause damage. Adjust the pressure settings if needed. This step is crucial, especially if your fence is made of softer wood, as excessive pressure can lead to splintering.
Step 6: Start Pressure Washing
Begin pressure washing the fence by holding the nozzle at a consistent distance from the surface. Move the wand in a sweeping motion, overlapping each pass to ensure thorough coverage. Work from top to bottom, following the natural grain of the wood. Take care not to linger in one spot for too long, especially on softer wood, as this can lead to damage.
Step 7: Clean in Sections
Divide the fence into manageable sections and clean one section at a time. This allows you to maintain control over the cleaning process and ensures that no areas are overlooked. As you finish each section, use the garden hose to rinse away any detergent or debris, preventing it from drying on the wood.
Step 8: Repeat if Necessary
For heavily soiled or stained areas, you may need to repeat the pressure washing process or use a stronger cleaning solution. Be cautious with stronger chemicals, and always follow safety guidelines. Stubborn stains may require additional scrubbing with a brush.
Step 9: Allow Time to Dry
After completing the pressure washing process, allow the fence to dry completely before applying any sealant or stain. Depending on the weather conditions, this may take a day or two. Ensure proper ventilation to prevent mold or mildew from returning during the drying period.
Step 10: Consider Sealing or Staining
Once the fence is thoroughly dry, consider applying a wood sealant or stain to protect it from the elements. This step not only enhances the appearance of the fence but also provides a protective barrier against UV rays, moisture, and other environmental factors.
Step 11: Regular Maintenance
To prolong the effects of your pressure washing efforts, implement a regular maintenance schedule. Depending on your location and the type of weather your fence is exposed to, plan to pressure wash your fence annually or as needed. Regular cleaning and maintenance will help preserve the integrity of the wood and keep your fence looking its best.
In conclusion, pressure washing your home’s fence is a rewarding and effective way to revitalize its appearance. By following these steps and incorporating regular maintenance, you can ensure that your fence not only adds to the overall curb appeal of your home but also stands the test of time. Whether you’re preparing your home for sale or simply maintaining its beauty, pressure washing your fence is a worthwhile investment in the longevity and aesthetics of your property.

